Skip to content

ArduPilot

|602x385

In the drone world there are 2 kinds of people : the FPV bros and the other. For the other, sharing video can be important and for this we got a bunch of choices for Integrated Remote Controllers with HD Video support : Herelink, Siyi, etc !

In a wonderful world, everything would work out of the box … but … welcome to the matrix !

So those controllers can share video to the ground according to their documentation : tested on Herelink and Siyi. That is kind of true …

Let’s look at different usages

(This article isn't to shame or attack any manufacturer but to start some investigation on one issue and find a solution)

Boost Your Drone’s IQ with Dual Autopilot Systems Using ArduPilot

|303x386 Credit XKCD 2347

Sometimes we just want to fly a drone with an expensive payload, or we need to test the code of the trainee that he/she swore he/she tested it. In the rapidly evolving field of unmanned aerial vehicles (UAVs), ensuring the reliability and safety of operations is a must have. One of the latest advancements aimed at addressing these concerns is the implementation of dual autopilot systems. In this blog post, we will explore how using a double autopilot configuration with ArduPilot enhances the reliability and functionality of UAVs.

|540x500

Because yes, we can do it for years since October 2019

EASA Launches Groundbreaking Survey for Drone Manufacturers in the EU

DALL·E 2024-01-20 10.07.09 - A conceptual illustration representing the European Union Aviation Safety Agency's (EASA) survey for unmanned aircraft system (UAS) manufacturers, wit|500x500

In an exciting development for the European drone industry, the European Union Aviation Safety Agency (EASA) has recently initiated a pioneering survey specifically targeting unmanned aircraft system (UAS) manufacturers. This survey is a significant step forward in understanding and shaping the future of the rapidly evolving drone market in the European Union.

https://www.easa.europa.eu/en/newsroom-and-events/news/easa-launches-first-survey-drone-manufacturers

EASA's Vision and the Survey's Purpose

The primary goal of this survey is to gather comprehensive data regarding current trends and project the future growth trajectory of the drone domain within the EU's civil market. The insights gained from this initiative will play a crucial role in guiding the development of future regulatory frameworks pertaining to UAS.

Who Should Participate?

EASA is reaching out to a broad spectrum of manufacturers. This includes those involved in designing drones, creating kits for drone enhancement, and providers of additional systems such as parachutes and flight termination systems. The agency emphasizes the importance of participation from manufacturers who design drones and kits intended for "professional" activities.

The Survey's Scope and Significance

Developed as part of the subtask 2 of RMT 0729, as outlined in EPAS Volume II - 2023 edition, this survey is meticulously structured to capture a wide array of information. It aims to assess the number and variety of drone models currently active in the EU civil market. Moreover, it seeks to estimate the potential growth and evolution of this market.

A crucial aspect of this survey is its focus on the development of kits by manufacturers (other than drone manufacturers) intended for installation on drones. These kits are designed to either reduce impact dynamics, like parachute systems (e.g., M2 as defined in SORA), or provide enhanced containment solutions such as flight termination systems (as defined in STEP 9 of SORA).

Your Contribution Matters

If you are a drone or kit manufacturer, your input is invaluable. Your responses will directly contribute to shaping the future landscape of drone operations and regulations within the European Union. Participation in this survey not only benefits the broader industry but also offers an opportunity for your voice to be heard in the formation of policies that could impact your business.

Deadline and Submission Details The deadline for submitting your response is February 9, 2024. EASA encourages all relevant stakeholders to participate and share their insights. You can submit your responses to the survey via the provided link.

Conclusion

This survey represents a unique opportunity for UAS manufacturers to influence the future of drone regulations and market trends in the EU. EASA's initiative underscores the importance of industry input in shaping policies that are both effective and conducive to innovation. As the drone industry continues to grow and evolve, collaborations like these are crucial for ensuring a safe, efficient, and forward-looking aviation sector.

JUnit Output support in Autotest Framework

DALL·E 2023-11-23 00.05.54 - A humorous cartoon image of a drone wearing a graduation cap and glasses, sitting at a computer and looking at a screen displaying 'JUnit Test Results|500x500

Hello ArduPilot Enthusiasts,

We've just merged a new feature for our autotest framework: JUnit output! Here's a brief summary of what this entails. Seasoned developers will probably know all this, but it should be new knowledge for non-developers.

The autotest framework.

This is the software suite we use each time somebody makes modifications to the ArduPilot codebase. It has the huge task of running tests automatically. ArduPilot’s AutoTest suite allows for the creation of repeatable tests which help prevent regressions in ArduPilot’s behavior. It is based on ArduPilot’s SITL architecture - a fully-software-based solution.

What kind of tests ?

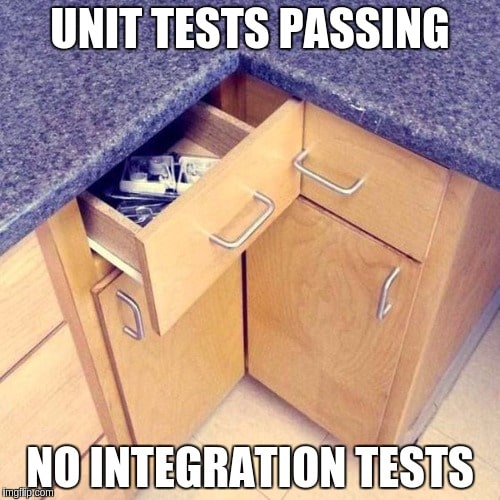
We do a lot of tests! Some check code syntax and common writing errors. But we also do unit tests and functional tests.

Unit tests focus on the smallest parts of code—individual functions or methods. They are designed to ensure that each unit of the software performs as designed. These cover most of our math functions.

Functional tests are concerned with the overall operation of the system. They test larger sections of the application, often entire features. They are performed in an environment that closely mirrors production, so with SITL in our case ! There are close to 1000 of these, trying to test most of ArduPilot's features.

|500x500

How much do we test ?

We've got code coverage support. It's a metric used to gauge the effectiveness of tests by determining which areas of the codebase have been tested and which have not.

On 22/11/2023, here are our coverage statistics (https://coveralls.io/builds/64044563):

Global : 57.646% Lines

  • AntennaTracker : 68.03%
  • ArduCopter : 66.01%
  • ArduPlane: 71.2%
  • ArduSub: 46.38%
  • Rover: 61.08
  • AP_Periph: 54.55%
  • libraries: 56.33%

We can compare with one years ago (https://coveralls.io/builds/54387841):

Global : 56.114% Lines

  • AntennaTracker :67.05%
  • ArduCopter : 64.63%
  • ArduPlane: 67.16%
  • ArduSub: 33.96%
  • Rover: 61.97
  • AP_Periph: 58.59%
  • libraries: 55.05%

We can see that we are slowly raising our coverage rates. Ideally, we should aim for 100% coverage, but this is challenging, especially in a FOSS project like ArduPilot. Writing tests is quite lengthy and sometimes difficult, which can delay contributions to the project.

How to use Autotest ?

Well, we've got some documentation about this, so let’s read the wiki! It isn’t hard: https://ardupilot.org/dev/docs/the-ardupilot-autotest-framework.html !

Don’t forget, if you implement a feature and have a test for it, or better yet, you write a test for it, you can run tests individually: running-a-specific-sub-test

That saves a lot of time by testing only what you need.

Plus, our shell completion system makes test execution a breeze – get ready to make the most of your Tab key!

Junit ?

The JUnit format is a widely-used standard for reporting the results of software tests. It's not a formal standard, but rather a convention that has become a de facto standard due to the widespread adoption of JUnit and similar testing frameworks in the Java ecosystem. Test results in JUnit are typically outputted in an XML format. This XML format is structured and easy to parse, making it compatible with a variety of tools and systems for further processing, like continuous integration servers.

Previously, running the test would provide a small summary at the end in your terminal with information like this:

>>>> PASSED STEP: test.CopterTests1a at Thu Nov 23 00:01:26 2023

With the JUnit output, you get an XML file in addition that looks like this:

<?xml version="1.0" encoding="utf-8"?>

<testsuites>

<testsuite name="Autotest ArduCopter test.CopterTests1a" timestamp="2023-11-16T14:43:23" tests="27" errors="0" failures="0" skipped="0" time="233.136">

<testcase name="PIDTuning" classname="ArduCopter" time="5.101137638092041"/>

<testcase name="ArmFeatures" classname="ArduCopter" time="20.81020736694336"/>

<testcase name="SetHome" classname="ArduCopter" time="11.95091986656189"/>

<testcase name="ConfigErrorLoop" classname="ArduCopter" time="2.7126312255859375"/>

<testcase name="CPUFailsafe" classname="ArduCopter" time="5.354845762252808"/>

<testcase name="Parameters" classname="ArduCopter" time="9.803567171096802"/>

<testcase name="LoggerDocumentation" classname="ArduCopter" time="3.151670217514038"/>

<testcase name="Logging" classname="ArduCopter" time="13.548582315444946"/>

<testcase name="GetCapabilities" classname="ArduCopter" time="0.07680463790893555"/>

<testcase name="InitialMode" classname="ArduCopter" time="2.385150909423828"/>

<testcase name="NavDelayTakeoffAbsTime" classname="ArduCopter" time="7.005534887313843"/>

<testcase name="NavDelayAbsTime" classname="ArduCopter" time="5.902580738067627"/>

<testcase name="NavDelay" classname="ArduCopter" time="5.835424184799194"/>

<testcase name="GuidedSubModeChange" classname="ArduCopter" time="7.143741607666016"/>

<testcase name="MAV_CMD_CONDITION_YAW" classname="ArduCopter" time="14.092246770858765"/>

<testcase name="LoiterToAlt" classname="ArduCopter" time="7.683399677276611"/>

<testcase name="PayloadPlaceMission" classname="ArduCopter" time="9.601360082626343"/>

<testcase name="PrecisionLoiterCompanion" classname="ArduCopter" time="7.640118598937988"/>

<testcase name="Landing" classname="ArduCopter" time="6.856537818908691"/>

<testcase name="PrecisionLanding" classname="ArduCopter" time="13.348423719406128"/>

<testcase name="SetModesViaModeSwitch" classname="ArduCopter" time="0.9609272480010986"/>

<testcase name="SetModesViaAuxSwitch" classname="ArduCopter" time="0.33498406410217285"/>

<testcase name="AuxSwitchOptions" classname="ArduCopter" time="0.5513660907745361"/>

<testcase name="AuxFunctionsInMission" classname="ArduCopter" time="3.2609589099884033"/>

<testcase name="AutoTune" classname="ArduCopter" time="23.587228536605835"/>

<testcase name="AutoTuneYawD" classname="ArduCopter" time="40.96126747131348"/>

<testcase name="NoRCOnBootPreArmFailure" classname="ArduCopter" time="3.4743480682373047"/>

<properties>

<property name="Firmware Version Major" value="4"/>

<property name="Firmware Version Minor" value="5"/>

<property name="Firmware Version Rev" value="0"/>

<property name="Firmware hash" value="d3d0f91c"/>

<property name="Git hash" value="d3d0f91c92a8d76a42d6fd7aa5ecb398bb464d6a"/>

<property name="Mavproxy Version Major" value="1"/>

<property name="Mavproxy Version Minor" value="8"/>

<property name="Mavproxy Version Rev" value="67"/>

</properties>

</testsuite>

</testsuites>

Another example with an output converted to HTML (smaller to fit in a picture): image|512x500

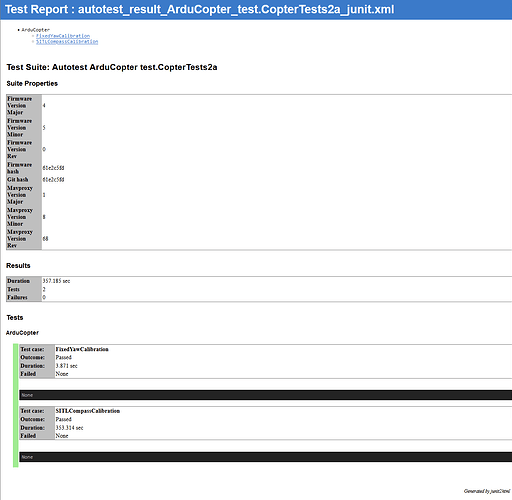
We can now integrate this into many CI systems to make useful statistics on our tests and have a better understanding of what is failing and when. This is an important feature for professionals using ArduPilot in their fleets.

Ha, yes ! To output JUnit xml, just add --junit on your autotest invocation, like this : `Tools/autotest/autotest.py build.Copter test.CopterTests2a --junit

In Conclusion

The introduction of JUnit output marks a significant step forward in enhancing our testing capabilities. By continuously refining our testing practices, we're committed to maintaining the high reliability and performance standards that ArduPilot users expect.

Stay tuned for more updates, and as always, happy testing (and flying) !

A Journey to fix a bug

|602x357

Several years ago, I shared a blog post about creating an RTK base station and transmitting data via an NTRIP caster, which worked flawlessly at the time. However, after some time, people encountered an issue with Mission Planner's connection to Centipède, the NTRIP caster in my demo. In this blog post, I will detail my journey to fix this problem and bring back the seamless functionality of my setup.

Customizing SITL Multicopter Simulations: Tailoring Realism to Your Drone

test_ardupilot|500x500

Introduction:

Many of you are likely familiar with the SITL (Software In The Loop) simulator within ArduPilot, which can be found here: https://ardupilot.org/dev/docs/sitl-simulator-software-in-the-loop.html. This simulator is user-friendly and quick to set up. However, one notable limitation is its physics simulation, which may not be fully comprehensive. While SITL provides a variety of parameters to manipulate your drone and test code features, did you know that you can refine the multicopter physics to align more closely with your drone's characteristics using a simple configuration file? Let's delve into this customization process.

Creating an RSS Feed from ArduPilot Discuss Forum Topics

image|637x388

Hello ArduPilot enthusiasts!

If you're like me, you enjoy keeping up with the latest discussions on the ArduPilot Discuss Forum, particularly in the Blog section. Today, I'll share a quick and easy method to create an RSS feed for specific topics, allowing you to stay updated effortlessly. Let's get started!

Step 1: Identify Your Preferred Topic Begin by navigating to the ArduPilot Discuss Forum and finding the section that interests you the most. For this guide, I'll use the Blog section as an example.

Step 2: Access the RSS Feed Link Once you've selected your preferred topic, look for its web address in your browser's address bar. For the Blog section, the URL is: https://discuss.ardupilot.org/c/blog/110.

Step 3: Convert URL to RSS Feed To transform the topic into an RSS feed, all you need to do is add .rss at the end of the URL. The final URL will look like this: https://discuss.ardupilot.org/c/blog/110.rss.

Step 4: Utilize Your RSS Feed Aggregator Now that you have the RSS feed URL, you can easily use it in your preferred RSS feed aggregator. This will enable you to receive real-time updates and notifications whenever there's a new post or discussion in your chosen topic.

Stay Informed and Engaged By following these simple steps, you can effortlessly stay informed about the latest conversations and updates on your favorite ArduPilot Discuss Forum topics. Whether you're interested in the Blog section or any other category, creating an RSS feed ensures you never miss out on essential discussions.

Enjoy

PS: I use https://www.netvibes.com, that is free, as RSS aggregator. The picture is from it

ArduPilot and Docker Part 2

ap_docker|690x174

There are numerous ways to use ArduPilot SITL with Docker, so here are some ideas on how to do it fast and lightweight.

The first and easier way is to use our default Docker image that you can find on the ArduPilot root directory. You can build it following the instructions on the wiki at https://ardupilot.org/dev/docs/building-setup-linux.html#setup-using-docker.

But as you can see, the image is large and long to build as it installs a lot of stuff that we don’t necessarily need.

╭─khancyr@pop-os ~/Workspace/ardupilot ‹master●›

╰─$ docker build . -t ardupilot_base

[+] Building 141.7s (20/20) FINISHED


╭─khancyr@pop-os ~/Workspace/ardupilot ‹master●›

╰─$ docker images

REPOSITORY TAG IMAGE ID CREATED SIZE

ardupilot_base latest  62620a6f257d 5 minutes ago 1.61GB

And this is just the environment to build SITL !

We could do a little clean up and remove the support for STM32 that we don’t need for SITL, we can reduce the image size and build time a bit. To do this, just add DO_AP_STM_ENV=0 to the ENV directive before the call of install-prereqs-ubuntu.sh.

╭─khancyr@pop-os ~/Workspace/ardupilot ‹master●›

╰─$ docker images
ardupilot_base2 latest  78618c4ff729 13 seconds ago 905MB

But how to build SITL now ?

Fortunately, Docker brings us a simple way to do this : Multiple stage build ! That means that we will build a new docker image using a previous image as the basis, and in this case the image we just built. So using ardupilot_base as the basis we can now clone ArduPilot at the revision/release we want. In the following part of my writing I will keep using the master branch.

A git clone should do it, followed by a git submodule init and update as always.

# syntax=docker/dockerfile:1
FROM ardupilot_base AS builder

WORKDIR /ardupilot

RUN git clone https://github.com/ardupilot/ardupilot.git src --recursive

Here is the result:

╭─khancyr@pop-os ~/Workspace/ardupilot ‹master●›

╰─$ docker images
ardupilot_base_git latest  3ebb0082c065 14 seconds ago 1.98GB

Hum hum, that is quite large again. Let’s shrink this. We just want to build a single SITL binary, so we don’t need the full ArduPilot git history, nor all submodules. After a bit of cleaning and a faster building time as we will get less things from the net :

syntax=docker/dockerfile:1

FROM ardupilot_base AS builder

WORKDIR /ardupilot

RUN git clone https://github.com/ardupilot/ardupilot.git --depth 1 --no-single-branch src \
    && cd src \
    && git submodule update --init --recursive --depth 1 modules/mavlink \
    && git submodule update --init --recursive --depth 1 modules/uavcan \
    && git submodule update --init --recursive --depth 1 modules/DroneCAN \
    && git submodule update --init --recursive --depth 1 modules/waf

Here is the result:

╭─khancyr@pop-os ~/Workspace/ardupilot ‹master●›
╰─$ docker images
 ardupilot_base_git2 latest  1627b855ce66 9 seconds ago  1.31GB

From this we can build the binaries we want into Docker. So the final image with the binary we want , in my case arducopter only, is there and we can run SITL, either directly from the binary or with sim_vehicle.py. Remember : SITL != sim_vehicle.py. SITL is ArduPilot simulation, sim_vehcile.py is a convenient python launcher for SITL !

But that is still a large image :

╭─khancyr@pop-os ~/Workspace/ardupilot ‹master●›
╰─$ docker images
 ardupilot_base_git3 latest  24989f5f4cb1 About a minute ago 1.4GB

For a simple binary 4,8Mb ! Let’s solve this by adding another stage to the docker build. We are lucky, SITL itself just needs the libstdc++ library to work ! But indeed that means no sim_vehicle.py support ... We can solve this later (Dockerfile here)

╭─khancyr@pop-os ~/Workspace/ardupilot ‹master●›
╰─$ docker images
ardupilot_base_ap latest  95f0278ba624 4 seconds ago  77.8MB

So that's what we can get ! Just 77.8MB for a working binary, that is the most portable and usable. sim_vehicle.py is useful but for fixed launches, calling the SITL binary is quite simple, so we don’t necessarily need it, and that reduces the image complexity as we don’t need to install Python, just to launch SITL !

Optimize the docker base image

Instead of using the docker image we get on ArduPilot, we could build a new builder image that is much simpler. I will detail some approaches on how to do this by reducing the dependencies to the strict minimum. It uses the same multi-stage technique as before but with a different base image. Therefore, I will detail the builder image and the final image with the SITL binary.

Ubuntu builder Dockerfile here

The builder is :

ardupilot_ubuntu latest  d979536e6336 5 minutes ago 893MB

That is much better than the previous base builder. The result with just the binary :

ardupilot_ubuntu latest  9775cda55321 19 seconds ago 82.8MB

That is a bit larger than the previous build as this was done with Ubuntu22.04 and not Ubuntu20.04 anymore.

Docker python image Dockerfile here

If you still want full Python support, you can still use the default Python Docker image. Please don’t try Python2, it is getting harder and harder to support, so just use Python3. Notice, this is Debian and not Ubuntu, so if you want to install some other packages, the name and version can change !

The builder is :

ardupilot_python latest  1d9feacc9510 7 minutes ago 902MB

Still better than the default builder.

ardupilot_python latest  fc61d9da0d83 About a minute ago 132MB

A bit larger than the Ubuntu version, but you got full Python support and can use sim_vehicle.py quickly.

Docker Alpine Dockerfile here

So Alpine Linux is a specialized distribution for Docker Containers, and we can use it for SITL ! There are a few differences with running a Debian based distro as Ubuntu, first one is that we are using musl libc (https://musl.libc.org/) and not glibc. What does it mean ? For the end users, probably nothing on usage, for the developers, a bit of adaptation. But as always, ArduPilot is already 100% musl compatible ! So no issues with using it.

The second difference is that it is annoying to install Python on alpine … So I don’t use it on Alpine ! 7egboo|690x388

The build is :

ardupilot_alpine latest  ce3b0c467592 9 minutes ago 688MB

The result is :

ardupilot_alpine latest  59bd11308a3d 59 seconds ago 12.6MB

That is probably the slimmer we can do, perfect for cloud !

How to run it ?

If you use my Dockerfile, there is a small script to store some default parameters and pass parameters from docker cmdline. A simple run will be :

docker run -it --network host ardupilot_alpine

Then you can connect any GCS on port 5760, example with Mavproxy :

mavproxy.py --master=tcp:127.0.0.1:5760 --console --map

And you are done !

You can also directly call the SITL binary, use sim_vehicle.py, etc.

That is all for now, there are surely numerous other ways to do this and to bring more improvement, but that is a good start ! Next step, use all this to deploy a swarm !